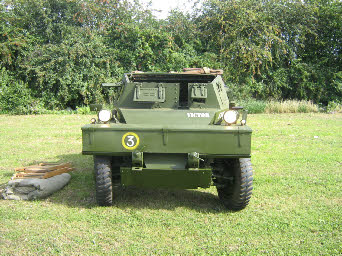
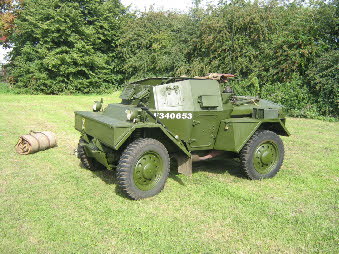
New Dingo Restoration Project
At the 2010 War and Peace show a fellow came up to me and said that his 70 year old father has a Dingo & that he intended to acquire and restore it. The car had been purchased from Banisters in 1978, bought home on a low loader, driven into a garage and had not moved or been looked at since.
This lead to a long conversation regarding the value of the cars, their history and technical aspects of a future restoration. He departed with a promise that if he could give me the vehicles details, I would try and establish some history of the car and also assist wherever practicable by providing advice etc.
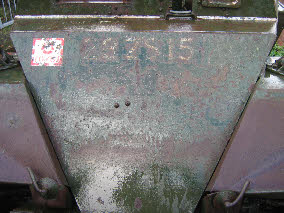
A few weeks latter I received a phone call from him and he provided the number of the car as 28ZS15.
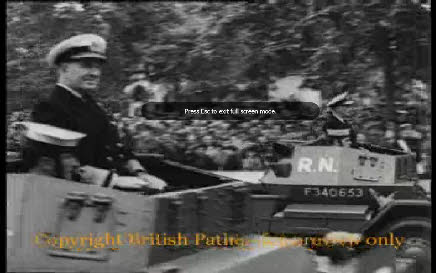
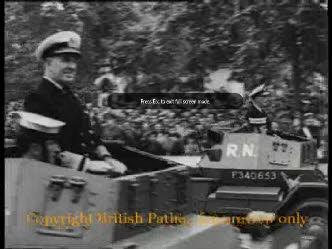
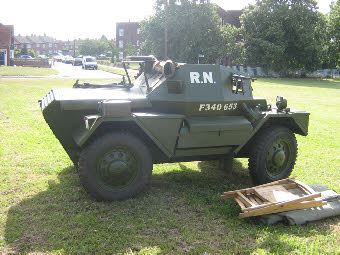
This number was compared with the Bovington key cards and it was established that the war time number was F340653. My records were then checked and it was discovered that I had already collected a photograph of the car being used by the Royal Navy in the 1946 victory Parade in London.
These details were then passed on.
Months went by and I received another call, he and his father had had a good look at the car and decided that the family had not enough time or technical knowledge to properly restore it. And so would like to sell it to a good home where it would receive the attention it deserved.
I immediately stated that I had an interest in buying the vehicle and a price was agreed, dependent upon the car being complete and substantially mechanically sound.
The big day
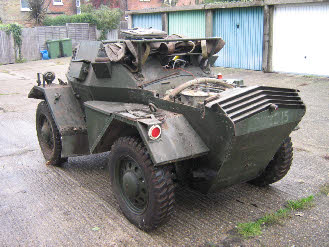
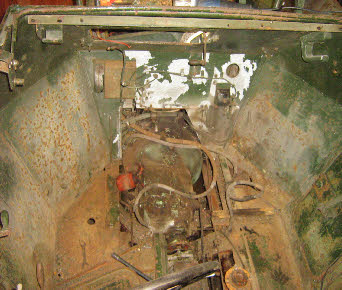
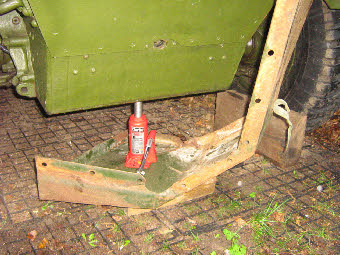
So on a muggy Saturday morning I found myself in Folkestone armed with a key to the garage in which it was stored. And with some trepidation opened up the door to find as promised a Dingo.
It was sitting there covered in 30 years of accumulated dirt and enough spider webs to do a hammer horror film set proud. Certainly no one had set foot into the garage in a very long time.
Not particularly liking spiders, I spend the next half an hour clearing the cobwebs and creepy crawlies off everything before actually looking at the car.
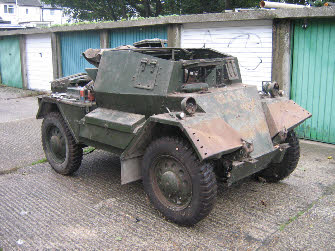
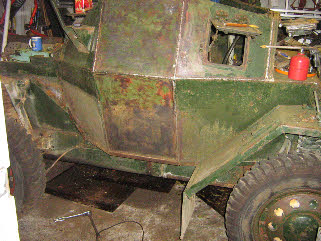
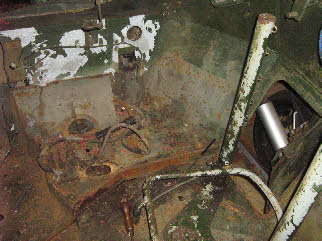
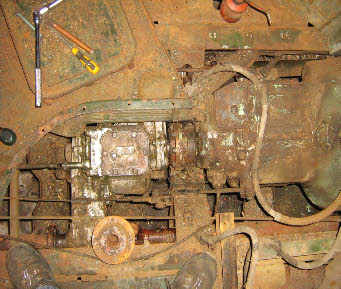
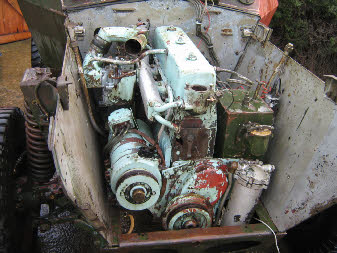
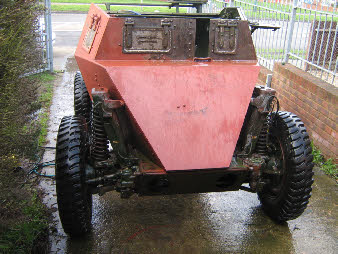
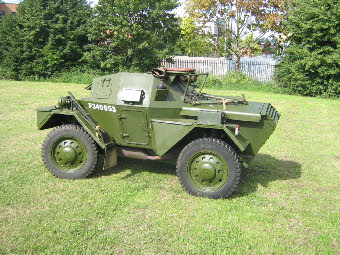
It was found to be a mark three with the two speed generator but had never been fitted with the horrible 1950’s smoke dischargers. It was suffering from cosmetic damage due to surface rust and the front box and wings need to be straitened. The front box was missing but could be seen standing at the rear of the car.
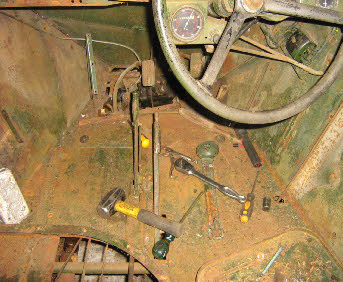
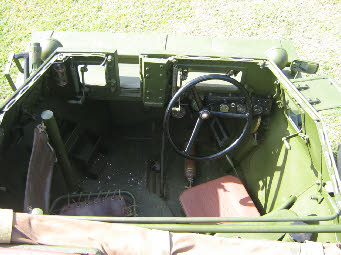
Climbing in, the transfer box was found to be still in reverse and the handbrake
firmly applied.
The car was just how the army left it, everything being well greased
up and oiled and the radio had been removed leaving the power cables and radio mounts
and straps in place!
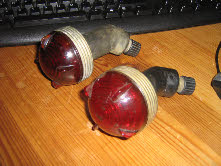
The bottom armour was all there as was everything else except the two butler headlamp covers. And judging by the German made interior switches it had obviously served after the war in Germany with BOAR.
So to work…………….
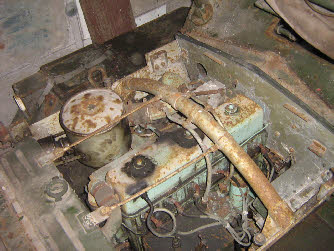
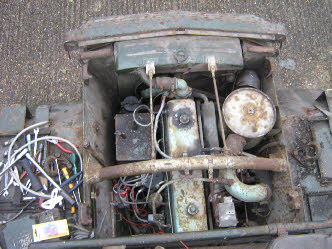
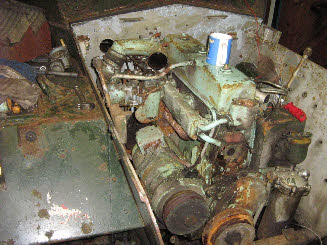
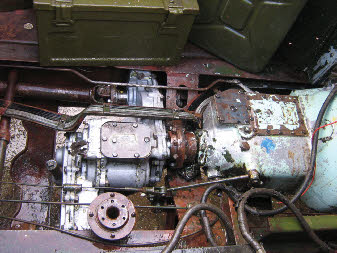
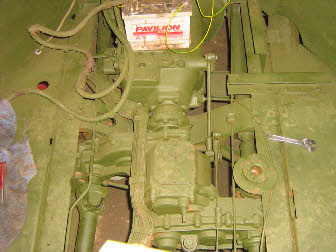
Bonnet off, removed and checked the plugs and also bores, all seemed well with no signs of water penetration. Poured some oil down the bored for good measure and turned her over with the cranking handle. All seemed smooth and effortless.
Connected a battery and spun the starter which whirred into life with ease which was a relief, cause I thought the bendix would be stuck with surface rust.
Next sparks, there weren't any. So cabled a replacement coil direct to the battery and changed the distributor cap and leads.
Some sparks were observed intermittently, so cleaned the contacts and swapped the condenser, Ok on three plugs and a little week on three, but enough.
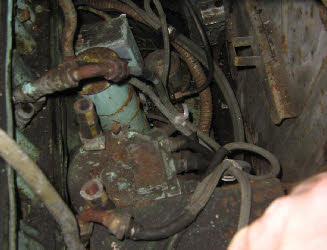
Connected a fuel can to the fuel lines, but the pump did not do anything. So with lots of swearing and grazed knuckles removed fuel pump. Striped it, cleaned and applied gasket sealer to faces.
On reassembly it now works. But in the process dropped the gasket and a spanner into the bottom of the car. With the armour on there's no way of recovering it. I wonder what else will be found down there?
After connecting the coil and fuel, gave it a spin and she burst into a low rhythmic chug. Let her tick over for a couple of minutes and then raised the revs slowly to get oil splashing around the inside of the engine.
Engine sounds sweet and oil is appearing in the tank, so this wet sumps like all the rest.
Have no water to test the radiator, but jump in and select 1st gear. Handbrake on (as there is little resistance to the foot brake) stamp on the gear change peddle and it crept forward upon releasing the brake. Throttle was very sticky so didn’t risk giving it a boot full. In case I shot forward with no means of stopping!
Out of the garage along the drive, selected reverse, back again, then driven back into the garage. During this time the foot brake has started to work!
And the exhaust is quiet, and no other untoward noises.
The only down side mechanically, was a engine oil leak somewhere that cant be identified cause of the armour plating, but its is dropping some out onto the concrete at a rate.
So after the inspection the deal was concluded, money exchanged and I had now purchased another car to add to my growing fleet.
The restoration.
Details of the restoration of this vehicle will be posted as it occurs
My target is to get it on the road for next years War and Peace Show where I have promised its former owners a drive……
Cleaning (November 2010)
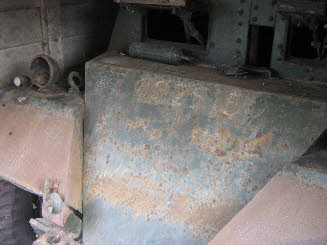
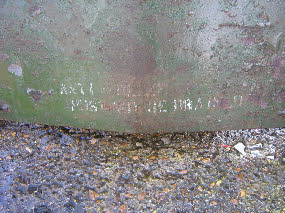
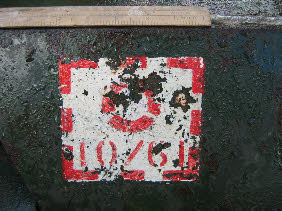
The first task has been to thoroughly jet wash the vehicle and to remove all of the loose paint and muck, this process has revealed a number of markings which were applied in the 1950’s. Rubbing down through the layers of paint has revealed a layer of red oxide primer, so at some time in the past the hull has been stripped to bare metal and repainted during a major army rebuild.
Sadly this process has lost any wartime markings than may have been applied.
The above markings give the postwar registration number. The square figure is a cold war marking indicating that the vehicle is not amphibious. Along side it is a stenciled marking A3 which presumably is the maximum fording depth.
On the turret sides the marking 1R RDY 3/61 indicate that the vehicle served with the Royal Dorset Yeomanry. The markings in the tail of the bonnet say ANTI FREEZE - MUST NOT BE DRAINED.
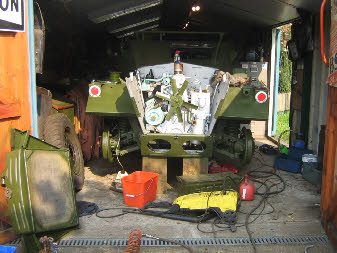
Disassembly (November & December 2010)
As the car appears to be basically sound I've decided that it is not in the cars best interest to completely disassemble it to individual parts for the restoration. This is based on the fact that if a mechanical component is not broken, it is often best to leave it alone except for changing oils, ensuring proper service adjustment etc.
There are a few exceptions to this where there are obvious faults need to be corrected or rectified.
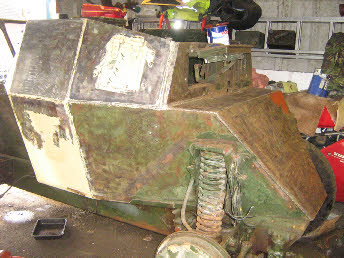
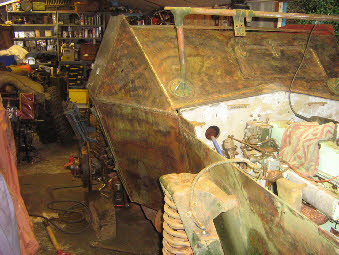
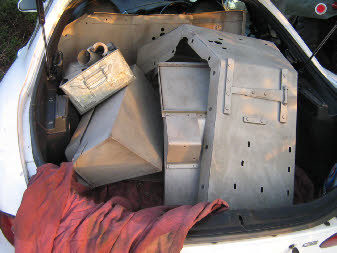
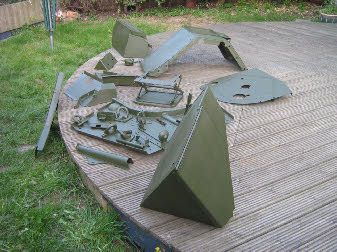
However the cosmetic state does require that all of the extraneous parts are removed for cleaning and refurbishment & repainting.
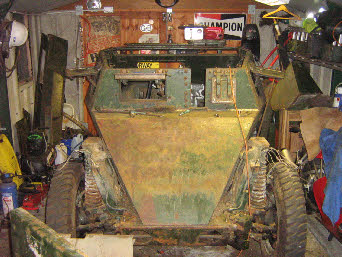
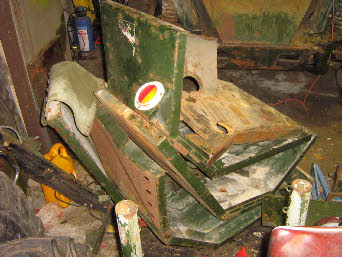
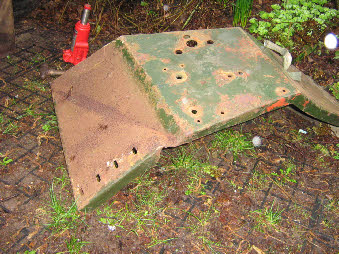
The stowage bins and rear wing is removed and set aside for refurbishment and some panels cleaned down to base metal with the aid of a scrapper and disk sander.
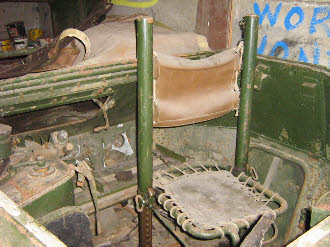
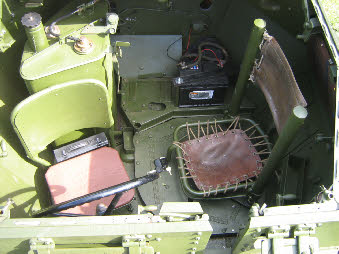
Radio shelf, grenade boxes, drivers seat and fuel tank are extracted, to be followed by the floor pan.
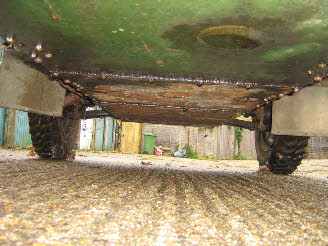
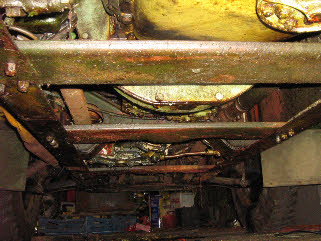
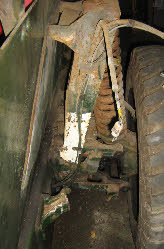
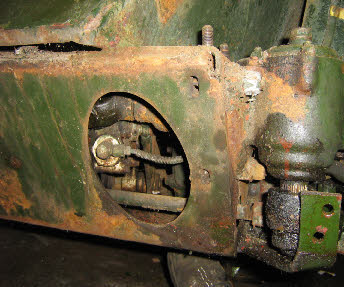
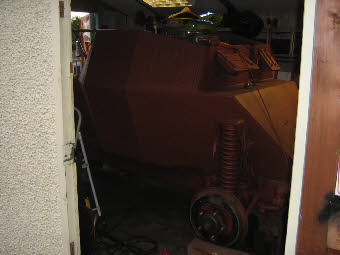
Lower belly armour is dropped to expose the drive train and engine, in the front there is light surface rust and at the rear accumulated oil deposits have preserved the car well.
I have a cunning plan to deal with the corrosion at the front of the car without disassembly.
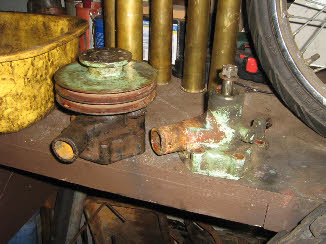
The radiator is removed and found to fully blocked with a ‘lacquer’ like substance, its filled with paraffin and left to see if this disolves..... The water pump seal has failed and so the pump is removed and set aside for repair. A spare pump taken off of the civilian DB18 engine is readied for use .
Next its off with the remainder of the wings and stowage boxes
The pile of clutter in the garage grows by the hour! After careful removal of reflectors etc, some straightening with a large hammer and some minor welding the wings and fittings shall be send away to a shot blaster for cleaning,
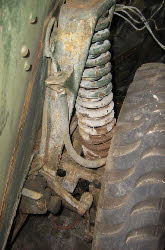
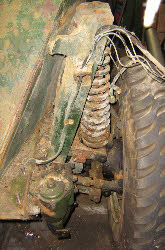
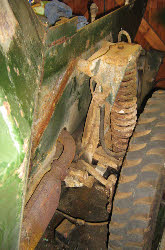
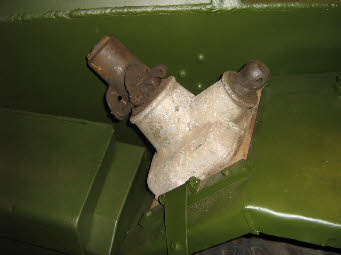
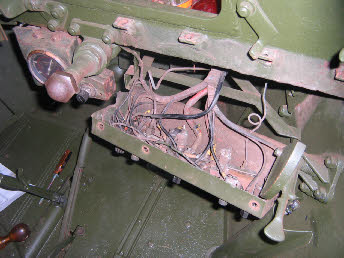
The four wheel stations and tyres are found to be in good external condition except for a layer of surface rust on steel parts, all of the joints bushes and bearings show evidence of being well greased. The armoured wiring loom is in good condition and it is hoped that most of this can be retained.
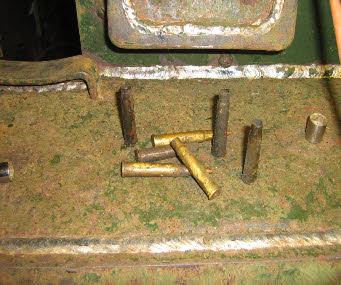
Found in the front of the car , trapped above the lower armour a number of 303 cartridge cases, presumably the remnants of usage of the Bren light machine gun. The cases are dated 1962.
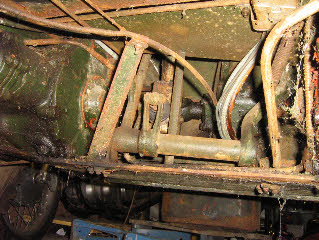
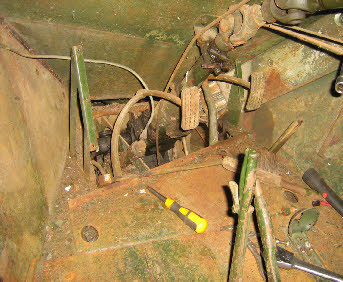
Commanders seat and rear floor plates are removed to expose the gear and transfer boxes, both are found to be correctly filled with oil. All (but one) of the bolts so far has been undone and removed without the aid of heat, penetrating oil or an angle grinder.
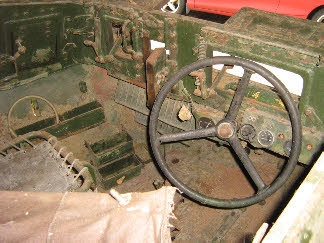
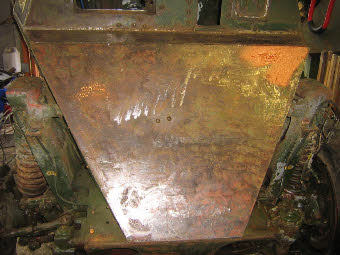
Interior plating and exterior armour is removed at the drivers foot well to expose the steering box and brake master cylinder.
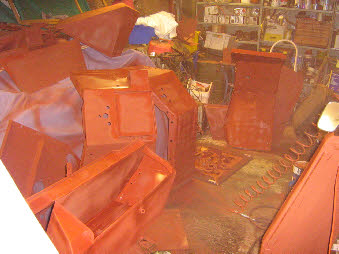
Cleaning and rubbing down and then yet more cleaning (January & February 2011)
On of the more boring but very necessary tasks is to clean the car of all grease and to remove the loose paint, rust down to a sound surface . This involves many hours of rubbing down,chipping off paint with a scraper, grinding it off with a flap wheel on an angle grinder, or attacking it with wire brushes attached to drills. Also the and the use of strong de greasers and high pressure power washers.
Flat armour plate is fairly easy to clean up as can be seen here, the remains of the yellow paint an attempt to put on a coat of primer that failed after the primer refused to harden due to bad manufacture......lots more unnecessary grinding required to remove it again. The next try will be with ‘trusted’ red oxide primer.
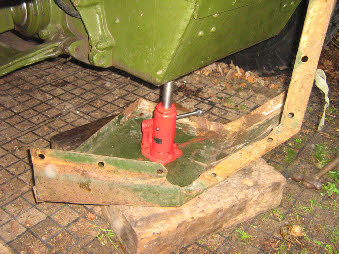
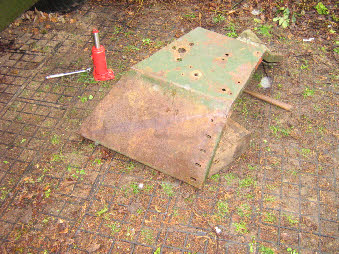
The front wings have been badly damaged and folded, after hitting the wings with a large hammer I soon realised that these were not going to straiten very easily. So after a bit of head scrathing developed a scheme using the daimler ‘heavy’ as a jacking point and a 6 tonne hydraulic ram to load the panels.
The results are not perfect but as the remaining ‘fold’ will be hidden under the front bin are acceptable.
A few taps of the hammer to clean up the bent edges, some weld and will be ready for shot blasting
The rubbing down cleaning continues and the application of the undercoat commences
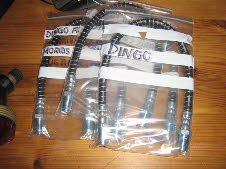
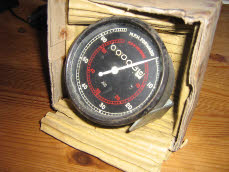
A trip to a militaria fair and some ebay shopping produce these new old stock goodies that will come in useful. (And no that speedo is not for sale)
The grit blasted wings and stowage boxes are returned from the blasters, and the garage soon turns into a hellish vision of red oxide.
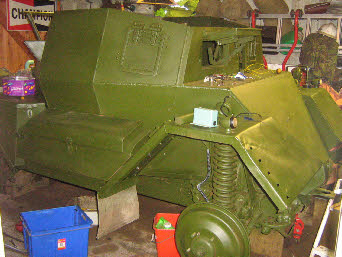
Parts are then sprayed green and laid out in the sun to dry, very soon after they are bolted in place.
The car starts to reassemble, all the drive train components are also painted green, I know its not the correct colour, but as they will be covered by the floor and under armour they are not going to be visible.
Fitted with new water pump and various gaskets the engine bay takes shape, above right am original dingo jack was obtained thanks to a tip off from a fellow enthusiast in the USA.
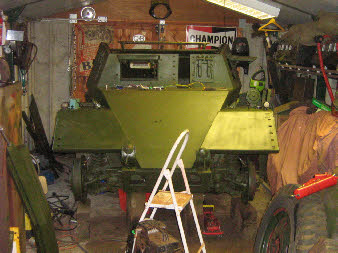
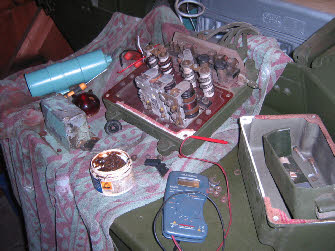
The wiring loom is checked and a few wires rerun to rectify brakes in the circuits, the regulator box is readjusted and the ammeter now shows a charge when the engine is running.


The Daimler Fighting Vehicles Project
New Dingo Restoration Project